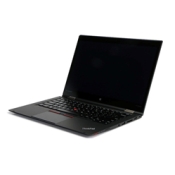
My oldest laptop is a Lenovo Thinkpad Carbon X1 (6th-gen Type 20KH). I still use this because it is solid, light, significantly smaller than my standard laptop (LG Gram 16), and I have a couple of handy docks for it. I use the Gram if I’m going to be doing significant writing/development because I need the larger screen, but the 14″ X1 is perfect for non-work travel when I only need light/occasional internet access. So I plan to keep it in service for a while.
Because Windows 10 will be end-of-life next year (October 2025), I wanted to upgrade the X1 to Windows 11. The good news is that it supports Win11 (and is now running it). The bad news is that the instructions for upgrade on the Lenovo website are atrocious. If you follow them, in many cases, your laptop will be rendered temporarily un-bootable.
The underlying problem is that the hard drive on many X1s is formatted using the old MBR (master boot record) partition style which is what’s used by the legacy BIOS mode. Windows 11 security requires secure boot UEFI instead of legacy BIOS. UEFI in turn requires booting from a hard drive formatted with GPT rather than MBR. As long as your X1 is set to boot in legacy BIOS mode from a drive with MBR partition table, Windows Update will indicate that your X1 is not able to run Win11. Microsoft’s PC Health Check program (download here) will tell you why.
The good news is that Microsoft provides tools for converting your MBR formatted drive to GPT in place. The bad news is that the process is tricky and the instructions are scattered across the internet…hopefully this post helps. (Note: even though the conversion preserves all data, back everything up before you start this process just in case). You will want to do the following:
- If you haven’t already created one (and most folks won’t have), you need to create a local password for your user account on your X1. This password is different from the Microsoft online account you are probably using with Windows 10. The local password will be required in the next step. Unfortunately, I didn’t note exactly how I did this, but some instructions that may be useful are here.
- Check your hard drive to see whether it uses the MBR partition table and, if so, whether it can be converted to GPT (and then convert it). The instructions for this are here. Note that this will require you to boot to a command prompt in a special mode which will require the local password you created in step 1.
- If the conversion goes well, you can now reboot your X1, enter the BIOS setup and enable Secure Boot under the Security tab. This will likely enable some other things in your settings like the Trusted Platform Module (TPM) which are required by Windows 11 secure boot.
- If that has gone well, you should be able to boot into Windows 10 again and PC Health Check should indicate that your X1 is suitable for Windows 11. Unfortunately, the Windows Update screen in Settings will still say your X1 doesn’t support Windows 11 so you can’t use the automatic updates to upgrade to Win11.
- So the last step is to download the Windows 11 Installation Assistant here. When you run the assistant, it should take care of updating your X1 from Win10 to Win11.
My X1 is now running Windows 11 so I can confirm that this works.
A lot of useful information was found on the Lenovo Community Forum here.
