GW Instek PSP-2010

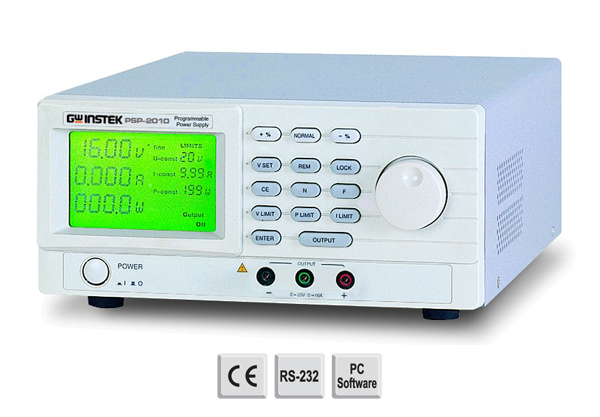
I have several bench supplies, but one that I am fond of is the Instek PSP-2010. As one might guess from the title, it’s a 0-20V, 0-10A 200W supply. It has a fan, but it stays off unless under heavy load.

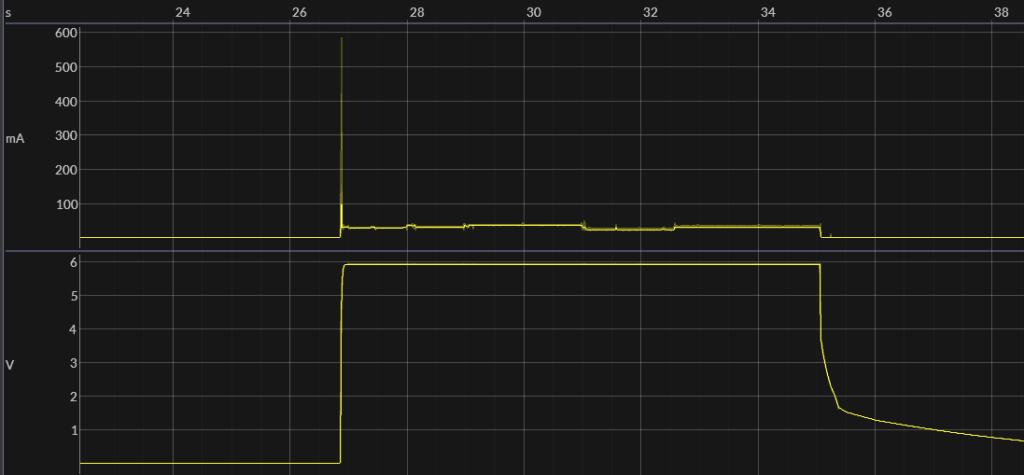
Pros: solid build: metal chassis with carry handle. Output is quiet: the switching is well filtered. Very clean startup and shutdown: many low/moderate cost bench supplies have voltage spikes when you turn the output on or off; this one is clean, even with a significant inrush load current spike as shown below. The voltage setting and current limit are accurate and it has a CV, CC, and CW modes. The current display goes to 3 decimal places and while it claims to have only 5mA resolution, mine seems to have 2mA. The voltage display resolution is 10mV; mine reads about 60mV high at 6V (i.e. it’s pretty accurate).

Cons: although it has a keypad, you can’t directly enter voltages and currents, you have to use the encoder wheel. It’s not terrible, it has buttons to select fine and coarse adjustment so it’s easy to get to the setting you want, but a full 0..9 keypad would be a really nice addition. The other con is the use of a DB9 serial connector for PC connectivity. C’mon guys, it’s not 1995…USB please.

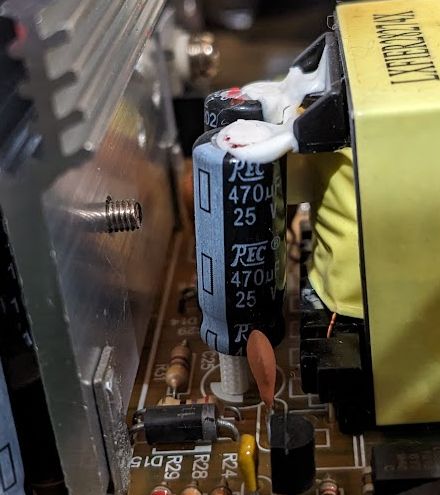
Repair: I use this daily and recently, when I went to turn the output on, the relay started to chatter and there was no output (i.e. it was failed). I was bummed and was getting ready to toss it, but as usual, eevblog came through. It turns out that there are two electrolytic capacitors in this supply (C25, C29) that commonly fail and when I opened mine up (6 screws and the cover lifts straight up), sure enough, those caps were bulging (see photo too right). I removed the board (4 corner screws plus a plastic locking standoff near the middle) and removed the caps; one measured 4.7uF, the other measured 14.6uF. I replaced them with Digikey P12389-ND, retaining the insulating standoffs from the old caps, and the supply works like a champ again!

Libre Renegade with eMMC

I’ve posted previously about the Libre ROC-RK3328-CC (aka Renegade) which is a single-board computer that is largely compatible with the Raspberry Pi, including connector and form factor, but offers some nice advantages (4GB, GbE, USB 3.0, fanless) and a very good price ($55 with heat sink on amazon).

Unfortunately, I’ve found that uSD cards as the primary storage medium for any SBC (including Raspberry Pis), eventually become unstable and need to be reformatted and re-flashed (losing anything that was on them). The problem is particularly bad for devices that are subject to power outages or always on or often writing to things like logs or database entries.

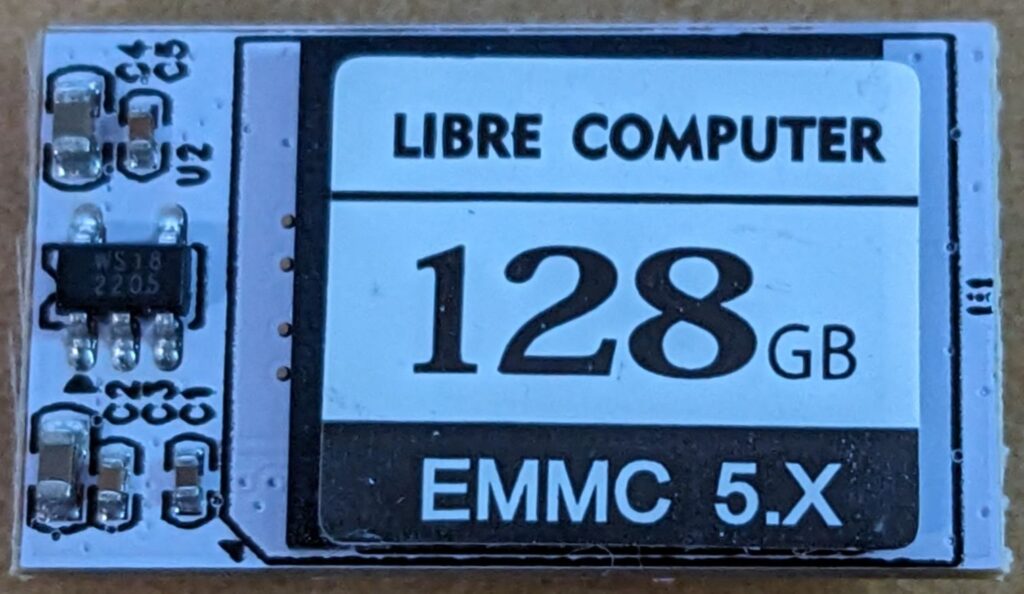
The recommended solution is eMMC storage, which fortunately, the Libre Renegade supports via a socket on the bottom of the board. eMMC is both faster and more reliable, intended to be used as a disk. I bought a couple of 128GB eMMC 5.x modules on amazon for $30 each (no longer available there, but seem to be available for $40 each here).

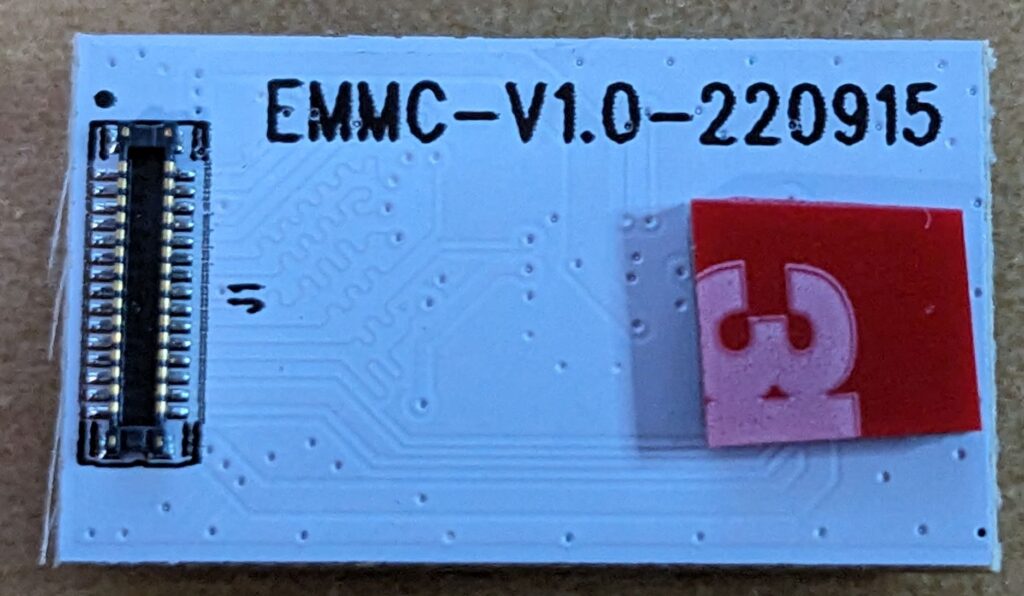
The modules plug into a connector on the bottom of the Renegade, but they don’t have a screw hole to secure them to the board properly so I used a tiny (0.25″ square) piece of 3M VHB 4611 double-sided tape to secure them a little better. This is small enough that it holds the board securely but it can still be peeled away without damaging either board. To install, position the connector first and snap it in place, then push down on the other end that has the double-sided tape to stick it securely to the Renegade main board.

The next issue was getting an OS onto the module. If you have a linux laptop/desktop, the process is fairly straightforward and can be done using the Renegade itself and an included USB A-A cable. Unfortunately, it can’t be done that way using a Windows PC; there is no Windows driver for the USB OTG socket on the Renegade. I also tried using the Libre LEFT tool, following the Windows process (described here), but I couldn’t get that to work.

So I used the following process:

  • Downloaded a pre-built OS image for the ROC-RK3328 under Downloads from here.
  • Used Balena Etcher to flash the image to a uSD card
  • Booted the uSD card on the Renegade
  • Confirmed that the Renegade could see the eMMC and that it was mmcblk1 (the uSD card should be mmcblk0):
    lsblk
  • Downloaded and installed the libre flash tool onto the uSD card to flash a bootloader onto the eMMC. See instructions here. (Note: this isn’t necessary, but it also doesn’t hurt):
    git clone https://github.com/libre-computer-project/libretech-flash-tool.git
    cd libretech-flash-tool
    sudo ./lft.sh bl-flash roc-rk3328-cc mmcblk1
    y
  • Downloaded a ubuntu OS image onto the uSD card:
    wget "https://distro.libre.computer/ci/ubuntu/22.04/ubuntu-22.04.03-preinstalled-server-arm64+roc-rk3328-cc.img.xz"
    unxz -v ubuntu-22.04.03-preinstalled-server-arm64+roc-rk3328-cc.img.xz
  • Flashed the downloaded OS image from the uSD onto the emmc:
    dd if=ubuntu-22.04.03-preinstalled-server-arm64+roc-rk3328-cc.img of=/dev/mmcblk1 bs=1M
  • Shutdown the Renegade
    sudo shutdown now
  • Powered down the Renegade
  • Removed the uSD card
  • Powered the Renegade up
  • Watched it boot (faster) from the eMMC.

If you want to compare speed to your uSD card, this is what I get from the eMMC modules:

sudo hdparm -t /dev/mmcblk0

/dev/mmcblk0:
 Timing buffered disk reads: 378 MB in  3.02 seconds = 125.34 MB/sec

Note: one might ask, why spend around $100 on a computer that is significantly less powerful than a comparably priced compact x86 platform? The answer (for me) is two things: size and fan-less operation. Together these make it perfect for DIN-rail mounting and use in my test beds which are built around modular DIN-rail mounted components.

ISSUES

The Renegade always attempts to boot from the eMMC module if it is installed. This creates several problems and IMHO was a bad design decision choice by Libre along with their awful choice of 1.5Mbps for the serial debug console.

  1. Forcing you to boot from eMMC makes it hard to backup the module. In Linux, making an image backup generally requires booting from another media, unmounting the partition to be imaged, and performing the backup. That’s tough to do if you’re forced to boot from the device you want to backup.
  2. If your eMMC module gets hosed, you can’t force the Renegade to boot from a uSD card in order to re-flash the eMMC. This, of course, happened to me (twice) and the way to recover was to power up the unit with a uSD card installed and a second or two later, install (hot-plug) the eMMC module. This way the Renegade starts to boot from the uSD card, but still discovers the eMMC module later in the boot process so you can re-flash it. Obviously this is risky; it helps to have the eMMC connector pre-positioned over the socket, with the double-sided tape on the other end of the module holding it in place as shown above. Then you can just gently pry the connector out of the socket while leaving the module stuck to the board at the other end and perfectly positioned to just push down on the connector to snap it back in place.

Refurbish Black and Decker Electric Lawn Mower

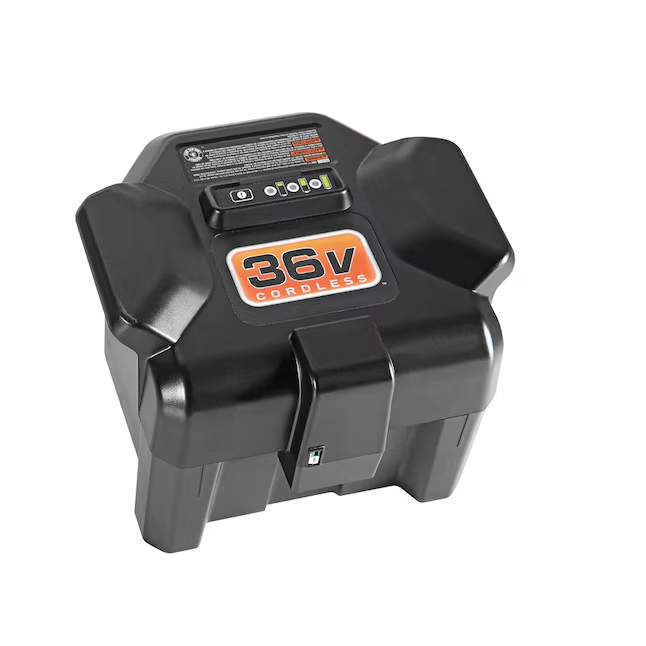
I’ve had my Black and Decker self-propelled electric lawn mower for a LONG time; I was an early adopter of cordless electric mowers and I love them: quiet, no gas fumes, good for the environment, virtually no maintenance. The only issues are: 1) it’s only 19″ wide so you have to do a bit more walking and 2) the lead acid battery is HEAVY (29lbs) and you need to remove it and charge it after each use.

Flash forward a decade or so and my lead acid batteries (I had two) have finally died; they won’t take a charge anymore. The electric lawn mower world has moved on to Lithium Ion batteries and you can’t buy a replacement anymore.

So the question is: fix or replace?

The battery is in a plastic shell that brings out the connectors, makes it water resistant, and keeps everything neat. There is an Anderson PowerPole-style connector to deliver power to the mower (high current) and a smaller Anderson polarized connector used for the (lower current) charger. The plastic shell is held together by 5 big screws and 4 small screws which I easily removed with a flat-head screwdriver.

Inside were 3 Kung Long WP12-12 sealed lead acid (SLA) batteries (12V/12Ah each) connected in series to make 36V/12Ah. The batteries were dead, one was even cracked open. The batteries were taped together and arranged in a T-shape with the long side vertical; each battery is 5.94 x 3.86 x 3.74″ and weighs 8.65 lbs. They were a bit expanded when I removed them and they measured (by caliper) 6.05″ x 3.882″ x 3.645″. They’re going to the recycling facility.

The options then are to:

Buy a new mower ($350-$600)
I’m a big fan of not throwing stuff out; it’s wasteful and bad for the environment. Moreover, most new mowers use 40V batteries that are only 3-5Ah (Black & Decker) to 6Ah (Ryobi). That’s not going to be nearly enough. The old 12Ah batteries were barely enough to do the whole lawn. Unsurprisingly, reviews of many new battery mowers say that battery life is too short.

Replace the SLA batteries ($83)
MightyMax maxes 12-12 batteries that are almost the same size and cost $27.67 each on amazon. This would be easiest, but then I’d still have that heavy battery pack and as I’ve gotten older, my back and I are much less fond of dragging 30lb batteries around.

Replace the SLA batteries with Lithium batteries
This I like. Lithium batteries have a much higher power density and so I can get similar power at dramatically lower weight. I know I can get Lithium Ion (LiIon) batteries that will easily fit in the shell, but I’d prefer LiFePO4 batteries which are similar, but safer and less prone to fire. There is quite a bit of space inside the battery shell; the challenge then is to find the right lithium battery.

One option would be to use three 12V/10Ah LiFePO4 batteries that are similarly sized such as the Goldenmate LFP-1210 (3 would cost $91.50 at amazon). These are 2.65lbs each and the manufacturer indicates 3 can be safely charged in series. All three batteries would weigh less than one of the SLA batteries. Goldenmate also has LFP-1212 (12Ah, $108 at amazon) and there are 12V/15Ah LiFePO4 batteries such as Sefepoder SP1215 (3 would cost $106 at amazon). Three of these batteries would weigh 10.5lbs so still a huge improvement over the SLA batteries plus more capacity! My main concern with any of these (aside from them being Chinese produced) is charging: I’d need a 36V (43.8V) LiFePO4 battery charger (at least another $30$62 the more expensive one claiming to be being UL listed – also Chinese, I’m skeptical).

There are many 36V 10-14Ah lithium batteries available for eBikes and eScooters; many come with chargers. The challenge will be to find one that fits comfortably. I’ll post more details here once I’ve selected a battery solution.

Attempt #1

I bought three TCBWorth 12V/12Ah LiFePO4 batteries for $30 each. They are spec’d at L=5.98″ D=3.86″ and H=3.78″ and even though that is *very* close to the original batteries, and they looked identical, they were just a little too big; The main problem dimension seems to be the height where the extra 0.1″ x 2 would not allow them to fit in the enclosure without deforming it so it would not close. I am surprised at how tight the tolerance is on the B&D enclosure, but it wouldn’t close with those batteries inside…and that’s without any double-sided tape binding them together! It tried cutting out some of the ribs in the plastic enclosure to make more room, but it wasn’t enough.

Attempt #2

I bought three XZNY “compact” 12v/12Ah batteries for $38 each. These are advertised as being 5.95″ x 2.56″ x 3.7″. These fit perfectly; they are much smaller than the original batteries and I filled the spaces left with foam blocks so the batteries are securely held in place. I re-assembled the battery enclosure and everything feels solid and secure. The whole assembly now weighs 11lbs; a huge improvement over the nearly 30lb original lead-acid battery pack.

Charging

Most LiFePO4 battery chargers I can find supply at least 6A+ during a fast charge phase. It’s also very hard to find any that are UL/ETL/TUV certified for under $150. Because my use-case is to mow the lawn and then put the battery on a charger and leave it there until the next week, I’d rather charge them gently (2A or less) and perhaps not to 100% charge.

LiFePO4 batteries follow a similar charging strategy to sealed lead acid (SLA) batteries with a constant current fast charge phase followed by a constant voltage float (maintenance/absorbtion) charge phase. Most manufacturers suggest the following:

Since I have 3 batteries in series, these numbers would be multiplied by 3, so the optimal float charge voltage would be 13.6 x 3 = 40.8 volts and the optimal (faster) charging voltage would be between 42.6 and 43.8 volts. Most commercial LiFePO4 battery chargers use the upper limit (43.8 volts) to achieve a fast charge cycle.

The charging terminals on the battery enclosure look like Anderson Powerwerx ACP-15). I may eventually find a 2A or less LiFePO4 battery charger and replace its output connector with Anderson powerpoles, but first, I’m testing the original Black and Decker SLA charger to see if it will do the job. It is a UL listed trickle charger that already has the Anderson connectors and charges the battery very slowly. If it charges to a voltage that is close enough to full but doesn’t overcharge, then I will use it.

A voltage vs. capacity chart is here (again, multiply by 3):

So if the SLA charger charges the battery to 13.6 x 3 = 40.8 volts, it will be at 100% charge. Even 13.5 x 3 = 40.5 volts = 95% charge would be fine. On the first charge, the B&D charger charged the battery pack to 40.75 volts (13.6 volts/battery) which is pretty much perfect. The charger ended with a blinking red light (charge failed), but otherwise seems to have done an excellent job.

I’ll document more results using the B&D charger and the LiFePO4 battery pack after I’ve run the mower through several charge/discharge cycles.

3D Printing – Diggro Alpha 5

Although I don’t do a huge amount of 3D printing, I periodically find the ability to print something incredibly useful, particularly for anything custom or low-volume.

I had been using a Diggro Alpha 3 I bought in 2020 for a long time and it continues to serve well. It is a re-branded Longer LK4 Pro or Alfawise U30 Pro (see here). It competes with the Ender 3, has a 220x220x250mm build volume, Marlin firmware, and comes standard with a variety of features that are options for the Ender like a filament run-out detector so your print isn’t ruined if the filament runs out or breaks mid-print; it can also recover from an unexpected power outage. What really stands out is its very nice touch-screen LCD user interface. Manuals and firmware are available from Longer here. I use Cura as the slicer.

Diggro Alpha 5

Having had a good experience with Diggro, I bought their newer Alpha 5 in 2023. It is similar to the Alpha 3, but offers several incremental enhancements including fully enclosed electronics, UL listed Meanwell PS, a convenient place for the filament spool. In theory, it supports automatic bed leveling, but I could never get that function to work properly. I level it by hand and once leveled, it stays level for many prints; the use of a flexible magnetic bed sticker really helps in that regard.

Through experimentation, I’ve learned a number of things that make 3D printing much nicer:

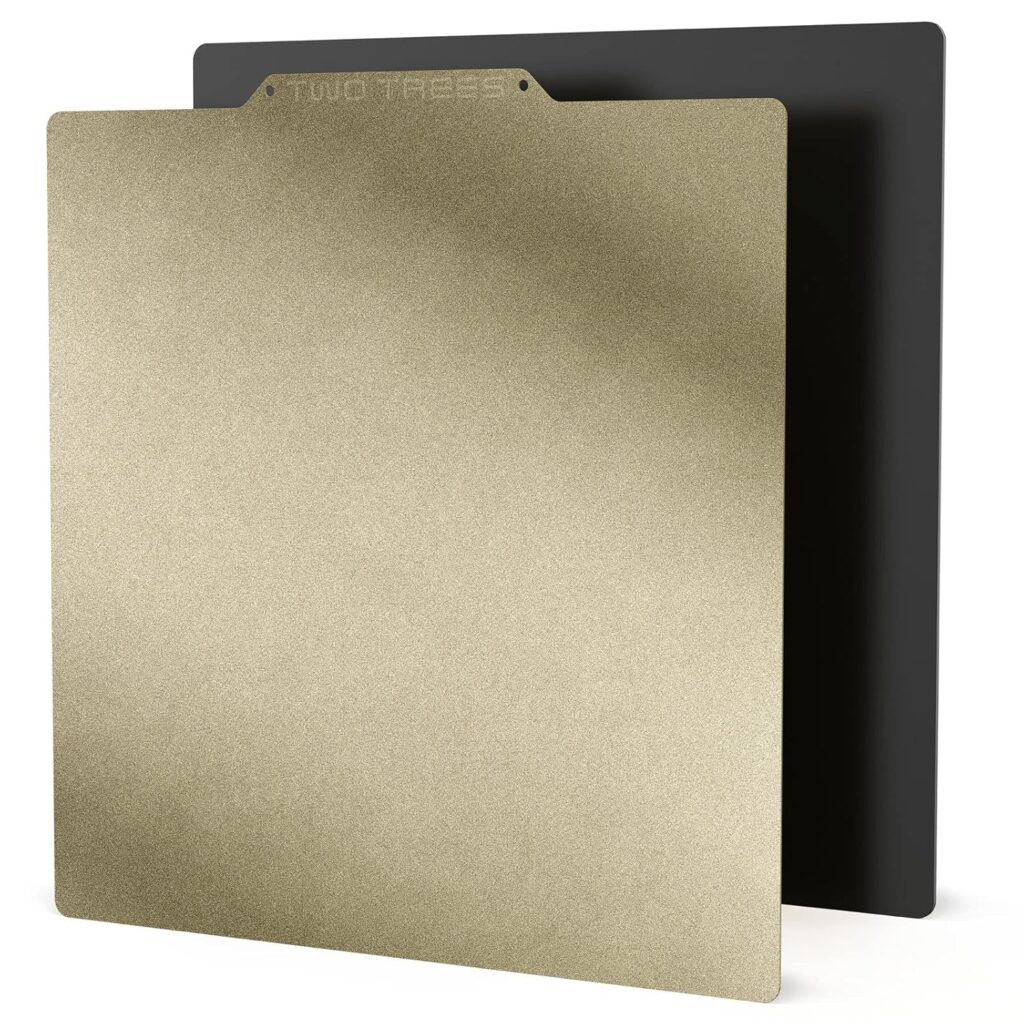
  • Use a flexible magnetic print bed. I bought a cheap one from BefenyBay for $13.59 on amazon and it works great. The magnetic feature lets you remove your print surface without messing up the leveling and the flexible surface makes it trivial to remove your print (just bend it and it peels right off – no more putty knives). Even better, PLA prints seem to just stick to the slightly textured surface without any painters tape or hairspray. This makes printing *soo* much better. The downside of this particular bed is that the surface is polycarbonate rather than PEI which means it can be damaged if the hot end comes down too far, pushing into the surface. A PEI surface like this is better.
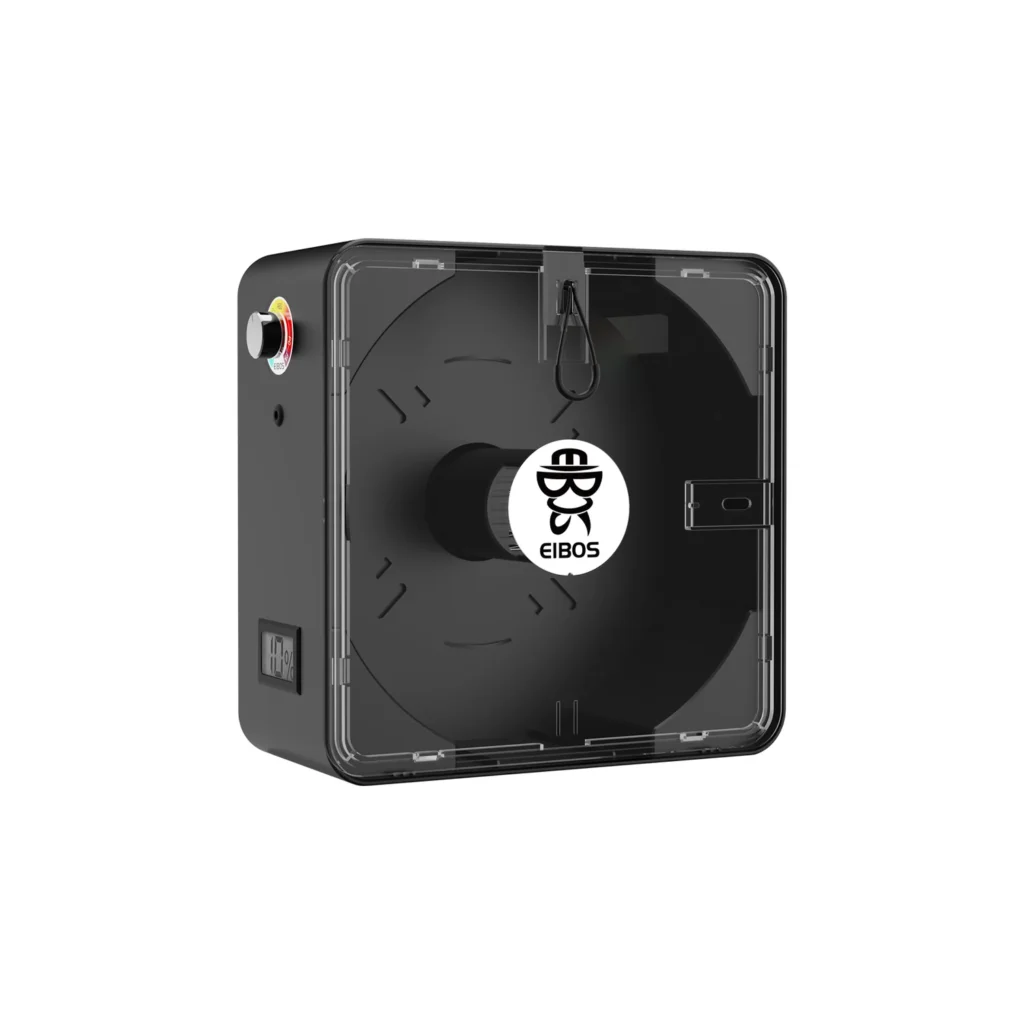
  • Dry your filament before you print. Most filament absorbs moisture and when it does, it causes all sorts of problems: the filament becomes brittle and breaks easily; the prints become covered with stringy fibers, overall results are poor. Fortunately, there are low cost filament driers where you can place a roll of filament and it will use heated air to dry it. I like the Eibos Easdry which has a built in humidistat.
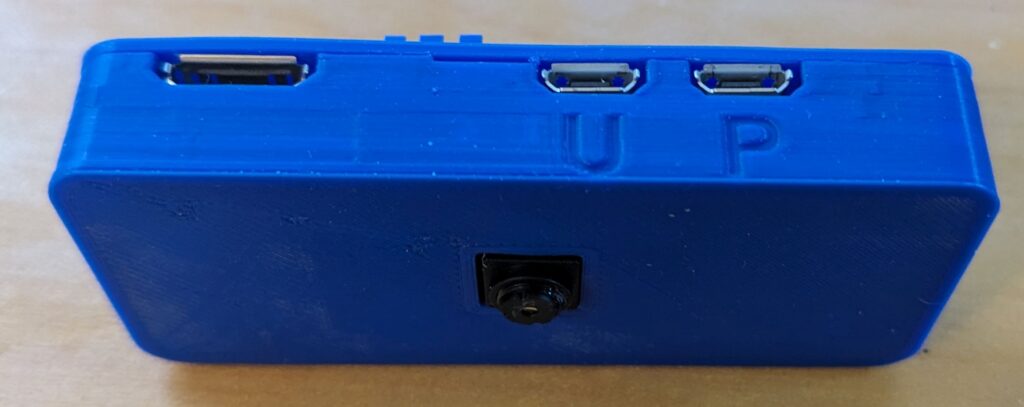
  • Octoprint – I run octoprint on a Raspberry Pi Zero 2W with an old Rpi camera. You must use at least a Zero 2W (not the original Pi Zero W). I tried RPi cameras version 1.3 and 2.0 and both worked great. The RPi connects to my wifi and to the printer. It provides a web interface to monitor and control the printer including uploading files, starting/stopping/pausing prints, monitoring the printer temperature, controlling the printer, and most importantly: monitoring the print remotely via the camera so if things go awry, I can easily abort the print. Octoprint basically network-enables your printer and is an essential feature IMO. You’ll never go back to running back and forth between your computer and printer with a uSD card. Octoprint requires a Raspberry Pi, a camera (strictly speaking, the camera is optional, but it’s so useful I consider it essential), a uSD card, a micro-to-B USB cable (my printer’s USB connector is type B), and a suitable power supply; I use a cheap 15W USB phone charger (make sure it is ETL or UL listed) and a micro-USB cable. The case is printed.
  • I continue to use (and like) Alibre as my 3D modeling CAD software.

Movies

Everyone has different taste in movies; here are some that I enjoyed; they range from silly to serious and some that are just “cultural-literacy”; YMMV. The list is very far from exhaustive (even of movies I like) and I’ll add to it over time.

Is it just me or were the 1980s an unusually good decade for movies and music?

Comedy/Action

Horror

Science Fiction

Super Hero

  • Most Marvel movies until 2020

Drama/Other

Teen Drama

Subversion Security for Teams

I’ve already ranted about why I still use SVN instead of Git. That said, it isn’t always obvious how to set up an SVN server securely, especially if you want fine-grained access control so certain users only get access to certain repositories or projects within repositories. It’s actually pretty easy with a few clever tricks.

My Requirements

  • Lightweight server – you shouldn’t need a lot of resources. In general, I run subversion in a proxmox VM with 2GB of RAM allocated and 1 processor core. I use minimal Ubuntu server as the OS.
  • Server access must only be via ssh. These days, nothing should be accessible over the internet that doesn’t use ssh and public key security.
  • The server should support multiple repositories.
  • You should be able to restrict user access to certain repositories and also specific projects (folders) within a given repository.
  • Disaster recovery should be easy.

How To Do It

1. Setup the server VM

  • Download the Ubuntu Server iso and store it in the /var/lib/vz/template/iso folder of your Proxmox host machine (if you don’t use proxmox, you probably should).
  • Create a Proxmox VM with 2GB RAM, 32GB disk space, and 1 CPU core which should be sufficient and select the Ubuntu ISO.
  • During installation, select the minimal install; it has nearly everything you’ll want and installing more things is easy using apt.
  • During installation, enable openssh access and create your superuser account.
  • Once installed update and upgrade as usual.
  • Install your public key in your home/myUser/.ssh/authorized_keys file. If you’re not familiar with how to do this, see here.
  • Once you have confirmed that your public key login is working, disable root login and password access in /etc/ssh/sshd_config.

2. Install Subversion and tools

  • Install subversion from the ubuntu repo
    sudo apt-get install subversion
  • Install your favorite editor any other tools you might want (vim, iputils-ping, etc.)

3. Create Subversion User and Repository

  • Create a user named “svn”
    sudo adduser svn
  • Create a folder to hold your SVN repositories:
    sudo mkdir /srv/svn
  • Assign ownership of the SVN repository to the svn user
    sudo chown svn:svn /srv/svn
  • Create an SVN repository:
    sudo svnadmin create /srv/svn/myRepo
  • Make sure the entire new repo is owned by the svn user:
    sudo chown -R svn:svn /srv/svn/myRepo

4. Setup SSH access

  • Create folder /home/svn/.ssh (should have 700 privilege)
  • Create file /home/svn/.ssh/authorized_keys (should have 600 privilege)
  • Add the SSH public key(s) for your workstation(s) to the authorized_keys file.
  • In front of each key add (so this and the key are all on one line):
    command=”svnserve -r /srv/svn/myRepo -t –tunnel-user=myUserName”
    An example of two lines in the file might be:
    command=”svnserve -r /srv/svn/ -t –tunnel-user=bob” ecdsa-sha2-nistp521 <Bob’s ECC public key>== BobLaptop1
    command=”svnserve -r /srv/svn/myRepo -t –tunnel-user=alice” ssh-rsa <Alice’s public RSA key>== AliceContractorPC
  • You will probably want other options in addition to the command option to keep things locked down. All options should be comma-separated with no spaces unless within double-quotes; options you might want after the command option might include:
    ,no-port-forwarding,no-agent-forwarding,no-pty,no-X11-forwarding
    So a full line for alice might look like:
command="svnserve -r /srv/svn/myRepo -t --tunnel-user=alice",no-port-forwarding,no-agent-forwarding,no-pty,no-X11-forwarding <Alice's public RSA key>== AliceContractorPC

5. Setup SVN fine-grained User Authorization

  • Edit /srv/svn/myRepo/conf/svnserve.conf
    anon-access=none
    auth-access=write
    authz-db = authz
  • Edit /srv/svn/myRepo/conf/
    [/]
    unrestrictedUserName = rw
    [/projectA]
    restrictedUserName = rw
  • This sets up an unrestricted user with complete access to all projects in myRepo
    and a restricted user who only has access to projectA within my Repo
    SVN authz supports groups for very flexible permissions:
    [groups]
    myGroup = userA, userB
    [/projectB]
    @myGroup = rw

Users will always access the server as user svn. The trick is in the authorized_keys file which will choose the right SVN username based on the public key that matched your login. So when Bob logs in, he will use his private key (which will match his public key in the authorized_keys file which will also assign his –tunnel-user name to “bob” (for example). When Alice logs in, she will use her private key (which will match her public key in the authorized_keys file which will also assign her –tunnel-user name to “alice” (for example). SVN will further restrict their access within each repository according to their tunnel-user name in the authz file(s).

Some nifty things to note:

  • You don’t have to create linux login users for bob and alice. In fact the only users who should have login shell access are you (your super-user account) and svn and they should only have public key access (no password login should be allowed).
  • When bob and/or alice login as the svn user, they only get access to SVN
    (the only command they can run is svnserve per the authorized_keys file).
  • You can restrict bob or alice to a specific repo in the authorized_keys file by setting their svn “root” using the -r parameter. So, for example for alice:
    command=”svnserve -r /srv/svn/myRepo -t –tunnel-name=alice”
    Alice is then restricted to the myRepo repository and may be further restricted by the authz file for that repository based on her tunnel-name to limit her to specific projects. She will not even know that there are other repos; all references to projects will be relative to the root, so for example she might checkout:
    svn+ssh://svn@myhost.mydomain.com/myProject
    Where myProject is in myRepo and Alice would not know about myRepo2.
  • You can implement fine-grained restrictions within each repository using the authz mechanism. You can read about that in detail here.
  • To access the server (e.g. from TortoiseSVN or your favorite SVN client), you access using the svn+ssh protocol with a URL like this:
    svn+ssh://svn@myhost.mydomain.com
    Your private key will grant you access as the svn user and determine which user SVN treats you as for security purposes.

Backups

Although you can always backup your repo(s) using the svn dump facility:
svnadmin dump /srv/svn/myRepo | bzip2 > myRepo_dump-$(date +%Y%m%d).svn.bz2
That only backs up the repository itself; it doesn’t backup all the work you did above to setup logins and permissions.

IMO, it’s much better for disaster recovery to simply backup your entire SVN server using proxmox. That way, you can stand up a new proxmox machine, restore the backup, and you’re up and running in a few minutes!

QNAP NAS

I replaced my ancient (but working) DLink NAS with a much newer and faster QNAP NAS (Model TS-464-8G). The QNAP hardware is nice: a compact package supports 4 SATA drives in a variety of RAID configurations, 2x NVMe drives, 2x 2.5GbE ports with option to add a 10GbE card, has a slick web-based user interface, and consumes relatively little power. It runs a custom linux on an a Celeron N5095.
I don’t like the custom linux.

UPS Support

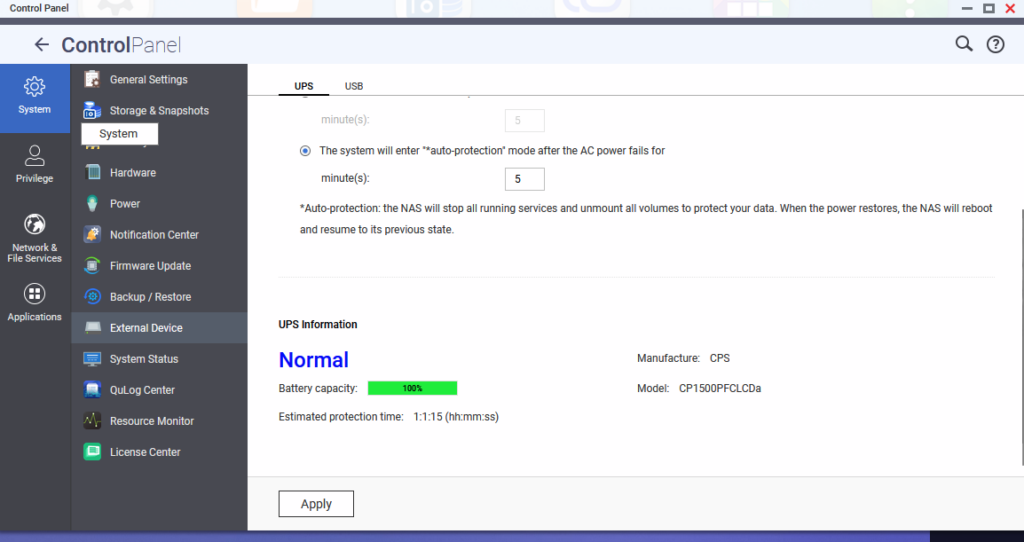
Naturally, I want my data storage to be protected by a UPS and to automatically and safely shut down before the UPS battery is exhausted if there is an extended power outage. I use a CyberPower CP1500PFCLCD UPS (which I am very happy with so far) to protect several NUC servers, an L2 switch, and the NAS. The UPS is connected to one of the NUC proxmox servers via USB. I run NUT on that server, including the nut-server that allows other machines (such as the NAS) to access the UPS over the network as nut-clients. The problem is that QNAP makes this more difficult than it has to be. They support nut (which is nice), but they seem to have done so mainly to allow one QNAP NAS to access another QNAP NAS connected to the UPS.

This is what I had to do to get the QNAP NAS to run as a generic nut client:

  • Control Panel -> External Device -> UPS Tab
  • Select Network UPS Slave
  • Enter the IP address of your nut server
  • Apply changes
  • Reset the NAS to start the upsutil (nut-client daemon) running

How did the NAS get the NUT UPS name, user name, and password used on the nut-server? It didn’t; the NUT support from QNAP hard-coded them as ‘qnapups’, ‘admin’, ‘123456’. And folks wonder why QNAP has had security issues.

You can change the user name and password by enabling the admin user, logging into the NAS via ssh as the admin user, and editing /etc/config/ups/upsmon.conf (make a .orig copy first). Find the line that reads:
MONITOR qnapups@myNutServerIp 1 admin 123456 slave
and replace ‘admin’ and ‘123456’ with the user name and password you have assigned for slave devices on your nut server in /etc/nut/upsd.users

Unfortunately, QNAP doesn’t let you change the UPS name; it *must* be qnapups
Fortunately, NUT provides a workaround for this that doesn’t require changing all the other nut clients. On your nut server, edit your /etc/nut/ups.conf file and add a new dummy UPS named qnapups that points back to your real UPS. For example, my ups.conf ends with:

[cp1500]
    driver = usbhid-ups
    port = auto
    desc = "CyberPower CP1500PFCLCDa"
    vendorid = 0704
    productid = 0601

[qnapups]
    driver = dummy-ups
    port = cp1500@myNutServerIpAddress
    desc = "Proxy UPS for QNAP NAS"

Restart the nut-server (sudo service nut-server restart) and voila your QNAP can then see the UPS:

Ubiquiti UISP

Ubiqiuti is a well known manufacturer of pro-sumer/small-business networking gear. They make two main lines of equipment: UniFi and UISP. The former aims for centralized control only (you can only manage devices through their management software); the latter is more traditional and allows for both direct device management (via command line and web interface) as well as centralized management through their free network management software UNMS. I’m old fashioned so I use the latter.

I use three primary types of gear: an EdgeRouter-X serves as the primary gateway into my network, a variety of EdgeMAX intelligent (layer 2) switches form the wired backbone of the network, and AirCubes provide wireless access.

The EdgeRouter is a particularly remarkable value; at $59, it provides a very full-featured comprehensive router + 4-port GbE switch. With hardware acceleration enabled, it delivers roughly 107MB/s (i.e. it routes at full gigabit speeds) while providing extensive support for features like VLAN, ipsec, dhcp management, NAT routing, etc. It has many more advanced features that I don’t presently use.

The EdgeMax switches work well and although they cost more than some other layer 2 switches, they work well and are fully supported by UNMS. One of the main advantages of this is managing firmware updates which is handled for all of the UI devices from the UNMS management console.

The UNMS network management package can be run locally (that’s how I use it) or, if you have at least 10 Ubiquiti devices, can be run on Ubiquiti’s cloud NMS. Although I have more than 10 Ubiquiti devices, I run UNMS locally (on a proxmox VM) for better security/control.

Baofeng Radios

Baofeng is a Chinese radio manufacturer that produces a line of radio transceivers. Starting with their UV-5 series, they became insanely popular because they are dramatically less expensive than competing products. A good HT from Yaesu, Icom, Kenwood, or Alinco costs over $100 and usually a few hundred dollars, but a Baofeng HT can be purchased for less than $20; a price point that was unheard of previously and simply amazing.

I couldn’t resist so I bought a few several years ago. I played with them briefly, confirmed that I could hit my local repeaters in the 70cm band, and then they sat on the shelf. Recently, I became interested in amateur radio again and decided to take a closer look at the performance of the radio. Does it reach its specified transmit power? What’s the receiver sensitivity? Most importantly, part of the responsibility of being a ham licensee is making sure you transmit in compliance with FCC regulations (FCC CFR 47 part 97) is it compliant? If it causes you to lose your license, it was no bargain.

TLDR: it turns out that most Baofeng radios are not compliant with FCC rules for amateur radio. To be compliant (47CFR Part 97.307e), any signals other than the intended (fundamental) transmit frequency must be at least -40dBc AND below -16dBm. Of the 5 Baofeng radio models I tested, only one was compliant. The rest generated unwanted (spurious) signals on multiples (harmonics) of the fundamental that violate the rules. Nevertheless, the GT-5R appears to be fully FCC compliant and an incredibly value. Details of all the radios I tested are below:

GT-5R (not Pro) – PASS!

After evaluating 4 Baofeng models that were not legal to transmit with on the amateur bands, I was delighted that the 5th time was the charm! The spectrum analyzer tells the tale (see pics below). For $18.39 with free shipping through amazon, the Baofeng GT-5R is indeed a dual-band 4W+ radio with proper harmonic suppression that allows licensed amateur radio operators to legally transmit in the 2m and 70cm bands. It’s absolutely insane that they can hit this price point; kudos to Baofeng!

GT-5R transmitting on 2m through 40dB attenuation…clean as a whistle!
GT-5R transmitting on 70cm – clean signal!

Transmit power (on high) was +35.54dBm (3.58W) on 2m and +36.55dBm (4.5W) on 70cm.

The measurements do not include cable or connector loss, but that should be very low at these frequencies with 12″ of RG-316. I confirmed the 10dB and 30dB attenuators were spot on using a calibrated RF signal generator. My total amplitude measurement error should have been (a lot) less than 1dB.

I also stepped through each harmonic with the analyzer zoomed in (50kHz span, 300Hz RBW, noise floor below -50dBm) and saw nothing of interest; the only measurable harmonic when transmitting on 2m was the 2nd which was below -30dBm. I was so pleased that I bought a second GT-5R which was also clean when checked (and had higher output power).

UV-17 Pro GPS – FAIL

Would 4th time be a charm? Nope. I ordered a pair of Baofeng UV-17 Pro GPS based on several internet reviews that suggested *they* would be clean and legal to transmit with. Although it’s a neat tri-band HT, sadly, the story was the same as with the other models I tested previously (below): not legal to transmit with on 2m or 1.25m, OK on 70cm. They’re going back tomorrow. The spectrum analyzer (with 40dB of attenuation in front), shows the 2nd harmonic on 2m is at +19dBm!:

UV17 Pro GPS transmitting on 2m
UV17 Pro GPS transmitting on 1.25m
UV17 Pro GPS transmitting on 70cm

UV-82 – FAIL

I connected my Baofeng UV-82, a dual-band (2m, 70cm) HT rated for 1W low and 5W high output power to a spectrum analyzer through a 30dB attenuator and transmitted on 2m and 70cm; the results and discussion are below:

UV82 transmitting at high power on 145MHz (2m band)

The transmitted power on 2m at the intended frequency was 3.9W which is pretty good, but the harmonics are awful. FCC regulations (47CFR Part 97.307e) state that spurious transmissions must be at least -40dBc (40dB below the carrier level) AND less than 25uW (-16dBm). The UV82 doesn’t even come close. The second harmonic is only -19.45dBc and even the third harmonic isn’t down 40dB. Both are well above -16dBm.

I switched the radio to 70cm and again transmitted at full power:

UV82 transmitting at high power on 440MHz

These results at 70cm are much better: the fundamental is at 4W and the second harmonic is down more than 40dB and is below -16dBm. The third harmonic isn’t visible. So, while there isn’t much margin, the UV82 appears to be good for amateur use at 70cm, but is not compliant in the 2m band.

It seems likely that the UV82 contains a low-pass filter that attenuates signals above 450MHz; which makes the radio compliant in the 70cm band, but is worthless for use in the 2m band due to the 2nd and 3rd harmonics. To use the radio in the 2m band legally, you probably need to install a 200MHz low-pass filter such as Mini-Circuits VLFX-225+ between the radio and antenna.

UV-B5 – FAIL

I also have a pair of Baofeng UV-B5 transceivers. They are also problematic with respect to spurious emissions, but interestingly in different ways from the UV82.

UV-B5 2m transmit on high power
UV-B5 70cm high power

In both bands, only the second harmonic is present with good suppression of higher harmonics. Unfortunately, the second harmonic violates the FCC regulations in all cases, so the UV-B5 can’t be used to transmit legally in either band. Compliance requires spurious to be BOTH -40dBc or better AND -16dBm or lower. I tested at high and low power and the second harmonic was much too high. Note: low power was measured at 1.5W at 2m and 1.25W at 70cm.

  • 2m High Power: second harmonic is -40dBc (good!), but is -4.82dBm (fails compliance)
  • 2m Low Power: second harmonic is at -5.88dBm (fails compliance)
  • 70cm High Power: second harmonic is -34.25dBc and at -0.12dBm. (fails compliance)
  • 70cm Low Power: second harmonic is at -8.08dBm (fails compliance)

This behavior is different from the UV-82; the third harmonic and above are well suppressed in both bands so these radios likely have separate VHF and UHF PAs (or at least harmonic filters). Unfortunately, they do not seem to be adequate and, as far as I can tell, it is likely illegal to transmit with the UV-B5 in either band, even at low power, unless you add additional filtering between the transceiver and the antenna.

The UV-B5s have another serious design flaw: if you leave the battery connected, it will gradually be drained, even with the radio off; so you must store the UV-B5 with the battery disconnected. Note: this is not the case for the UV-82.

GT-5R PRO – FAIL

I contacted Baofeng and they advised that their UV-5R and GT-5R comply with FCC part 97 & 15B. On their website, the GT-5R PRO is also advertised as FCC compliant and is tri-band, so I ordered a pair of GT-5R PRO and was dismayed to see that they too appear to be non-compliant on 2m. The first unit transmits at 3.37W at high power and has a huge spur at the second harmonic.

GT-5R PRO transmit at full power in 2m band

The second unit also transmitted at 3.3W at high power in the 2m band (35dBm) with a somewhat lower spur at the second harmonic of 0 dBm: better, but still not -40dBc AND below -16dBm. Interestingly, when transmitting at low power, the fundamental drops to 1.5W, but the 2nd harmonic actually goes UP by about 4dB!

The GT-5R PRO appears to be compliant in the 70cm band with the fundamental at 4.35W and no spurs above -20dBm.

GT-5R PRO transmit at full power in 70cm band

It’s possible I’m doing something wrong in my measurements; I would have liked to filter out the fundamental with a notch or high-pass filter before measuring the harmonics, but I don’t have the right filter and with the signal already knocked down 30-40dB, I don’t think I’m over-driving the SA. So I returned the GT-5R PROs.